Create an Easy Token
The easiest way to create a token is using one that already exists. You have a ton of options:
- Change colors
- Add banners and little figures
- Add or remove pieces
Change Colors
We have a ton of great tokens available in small and large formats. Find one you like, download, and open it into your favorite graphics program.
You have quite a few free and paid options to work with images: Gimp, Adobe Photoshop, Photopea, Clip Studio Paint, and so on. For these examples, I'm using Adobe Photoshop.
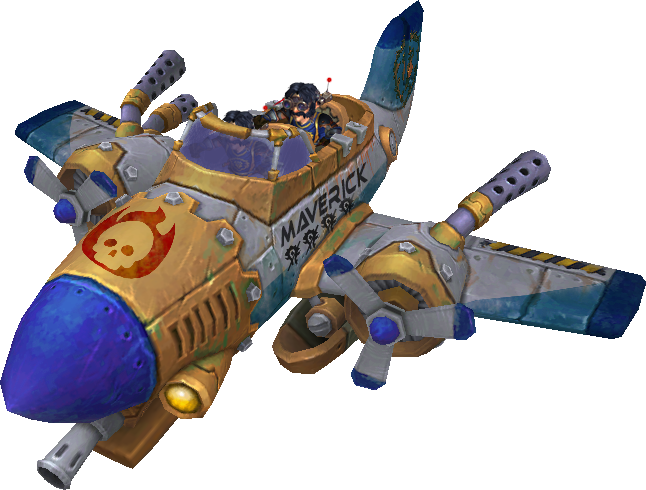
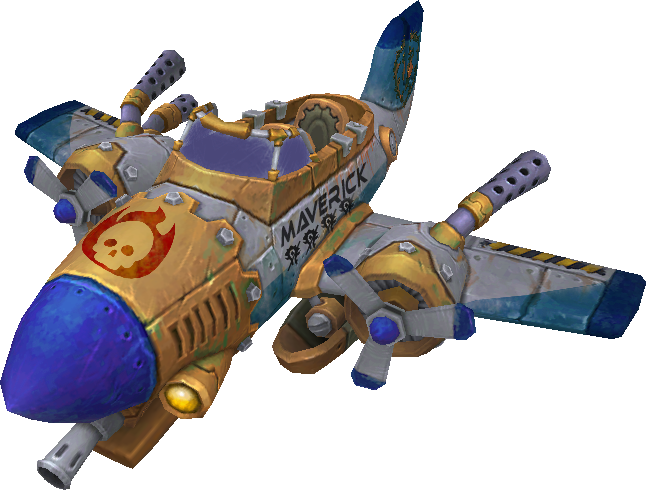
In these examples, let's use the Stormwind Bomber! The image has gold and blue highlights on a silver body. With color modifications, you can stylize it for your character.
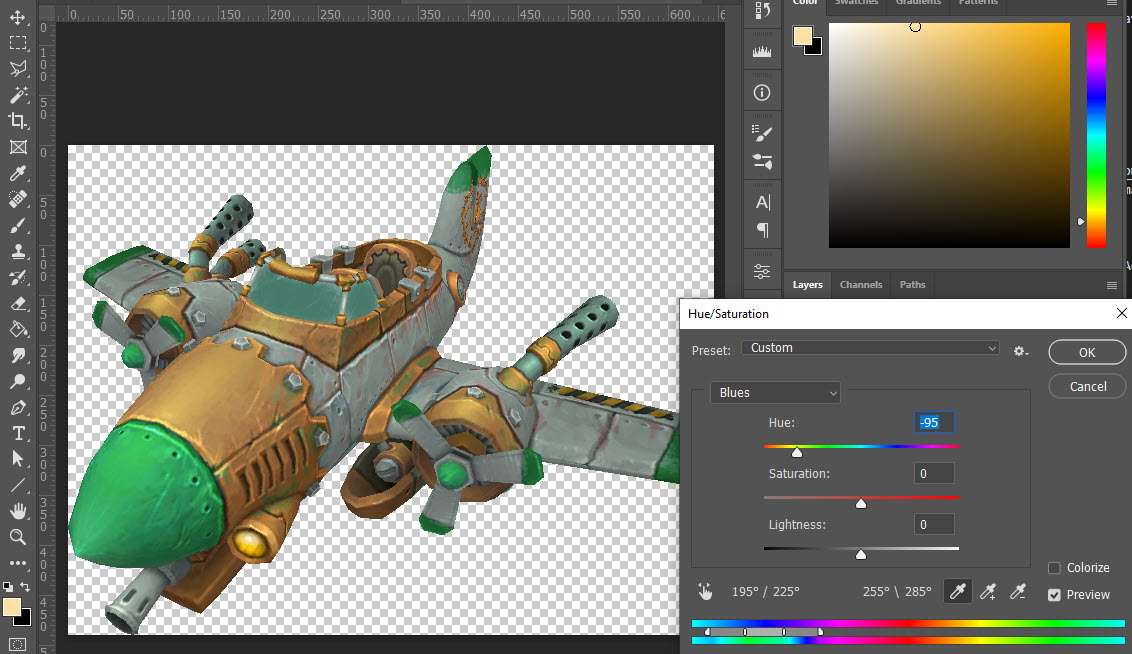
Hue and Saturation Method
Pinpoint specific colors to change:
-
Select Image > Adjustments > Hue/Saturation.
-
To change the blue, select Blue from the drop down. Move the Hue slider to shift the colors.
-
Save as a PNG, without any special effects.
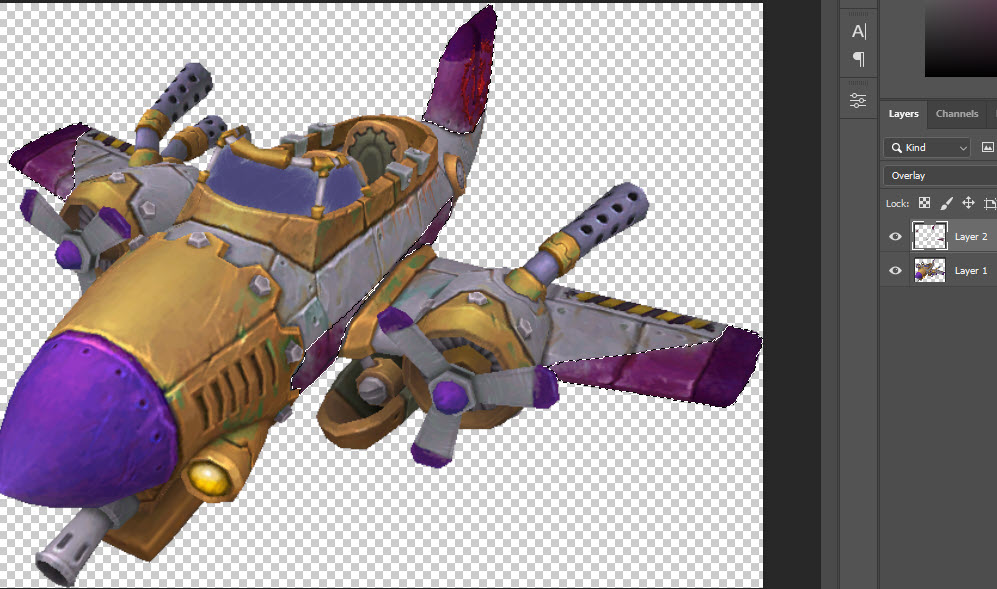
Layer Painting Method
For complex color changes, you have a ton of options. This one uses a new layer:
- Select sections with a Lasso tool. I highly recommend Polygonal that selects by clicking lines around your image.
- Create a new layer with a setting of Color (recolors layers below), Overlay (lightly shows what's below keeping solid colors, hiding black), Multiply (like Overlay hiding white), Soft Light/Hard Light/Pin Light (many nice options for shading your layers), or others.
- Select a brush and color. Paint within the selections on this new layer.
- Play a bit to see what you like, erasing or painting with grunge brushes, play with Hue/Saturation, and so on.
For this example, I changed the blue to purple, made selections, and painted with a grunge brush in an Overlay layer.
Add Some Flair
For some of your vehicles, you may want to add symbols or banners for your group or faction. There are many ways to add these, perspective tools, skew and distort tools, layers with effects, and more.
For this example, I liked the look of the purple bomber but want it blue. Let's add some flair!
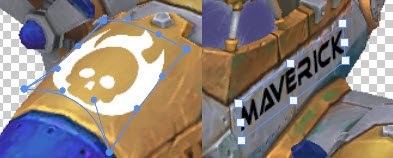
- Searching for icons, I look for a couple awesome images to use. I recommend Game-icons.net. Find an icon or two and download. I picked out a skull on fire with a type of none to make it easy to download and use.
- Copy and paste the icon into your image.
- Use one of your favorite tools to add the image to the bomber. I start with Edit > Free Transform to scale down and rotate. Next, I use Edit > Transform > Warp. I paint it the same way I did the wings.
- The pilot definitely needs a callsign! I add text of Maverick and use Edit > Free Transform to rotate, move, and stretch it. And I'll add a couple other goodies.
Here's our bomber!
Add a Character Model
Want more options that are easy? How about adding yourself into the model?
While you can grab your model in a bunch of ways, this is easiest using WoWHead just to cut down on applications.
-
Open the WoWHead Dressing Room.
-
Click Import, select your server, and enter your in-game name. Your character should load.
-
Change the transmog, sheath or remove weapons, and finish tweaks. Shift around with your mouse to match the bomber.
-
For Animation, select a look that works for you. You'll just use from the waist up. Some good animations are M > Mount options, R > ReadyJoust, W > WAGuard options, and L > LoadJoust.
-
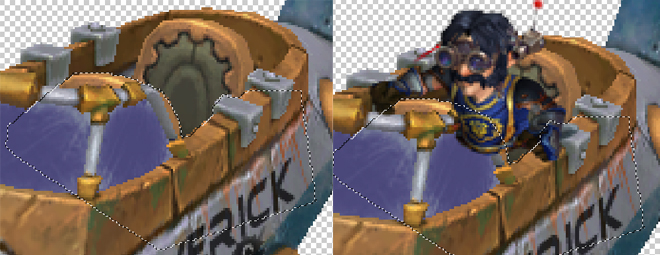
Take a screenshot and paste into your bomber image.
-
Use Edit > Transform tools to resize and tweak.
-
To remove the background greys, you have some options: Select > Color Range... and select colors using the eye dropper, use Polygonal tools to select, or Erase Background Color. You may need to use a mix of these. I like Color Range and removing/adding to the selecting using the Polygonal tools.

-
Size the pilot model to fit into the seat. You will need to select and remove more of the model to really make it fit. You may want to also decide which seat to add the model to, or add a couple.
:::sonceri Sharpen Tip The model may look a bit blurry when you resize. Try sharpening with some filters: Filter > Sharpen > select a sharpen option. I recommend Unsharp Mask. Make sure Preview is on to see the results before committing. :::
-
To remove bits, hide the layers of models, and use the selection tools to select the edges the model would not be seen through, like dashes or seats. Make sure you have the pilot model layer selected and hit delete.
-
Repeat for any added models.
:::sonceri Windshield Super Tip Adding a model to front seat would have the model behind a windshield. But you don't need to mess up the bomber! Select the area that you would delete like before. Select the Eraser tool with a soft brush. Set the opacity to less than 50%. Slightly erase away the pilot model! :::
Here's our piloted bomber and the Photoshop file to see how it works.