Capture Assets
With an idea for your build, begin capturing assets and by cleaning up the images you collected, start removing backgrounds, cutting up bits, and setting up layers.
You have numerous graphics applications and 3D model options for capturing assets, making edits, and saving your work. I have always used Photoshop CC with screen captures. These instructions follow that method, but the ideas can help anyone using any tool.
Set the Background Color
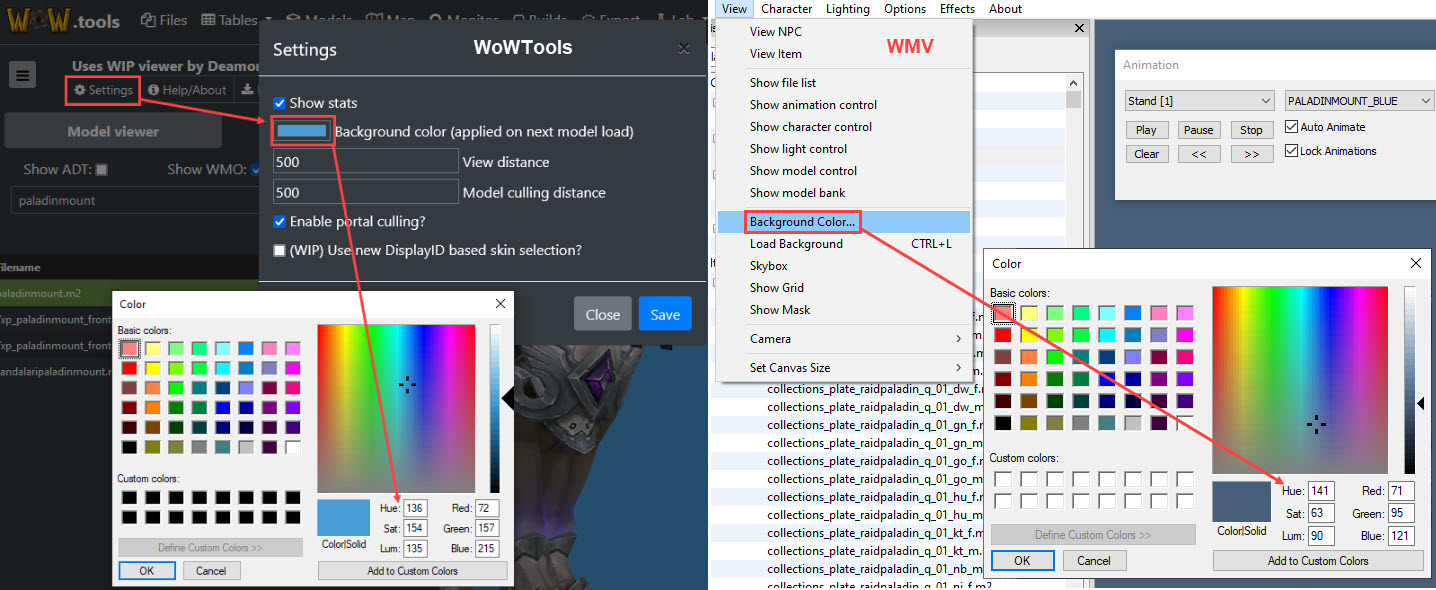
If you capture images in WMV or WoWTools, your background is a single color. You can change this color through settings in the tools. The default color is blue, but if the model you want to capture has this shade in it, you may want to select another shade. Be careful of using black or shades closely matching anything in the models as these could be easily selected if using tools to detect colors for removal.
Keep WMV and WoWTools background colors the exact same! This makes cutting out assets so much easier and faster. You can then save a ton of captures to a folder, record a Photoshop Action to mark the color, remove it, and save the images as PNGs without a background.
Capture Assets
When capturing assets in screenshots, use a program such as Windows Sniping Tool, Snag It, exporting to screenshot, etc for the best quality. Using PrintScreen options is not the highest resolution, just a quick option if you don't have another method. If using applications, you have tons of free and paid options available.
As mentioned before, try to use an isometric layout when capturing images for your bases. You can use any angle if you plan to carve up pieces for panels, additions, etc. Some things to watch out for are particle effects, as these can lead to problematic edits or lighting effects on armor.
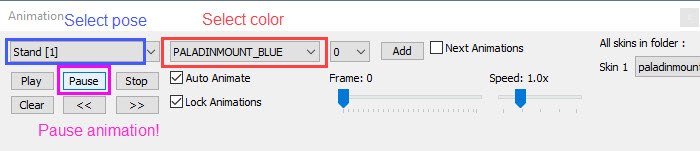
If you want to capture multiple colors of a model, select the animation, get the right angle you like, and pause! You can set this in WoWModelViewer (WMV) Animation panel and the Action menus in WoWTools and WoWHead. By pausing, you keep the exact same position for easier cutting of assets. Then you can stack the screenshots in graphics program, select or cut once, and capture asset pieces with multiple colors!
WoWModelViewer
Make selections, select Pause. You can use the slider to shift the animation. Select each model color, taking a screenshot.
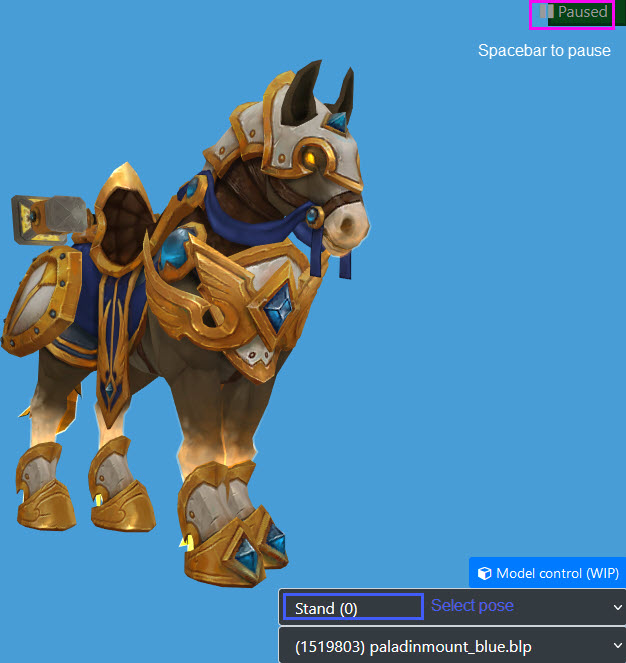
WoWTools site
Make selections, turn and set the model to a position, and press Spacebar to pause. Select each model color, taking a screenshot.
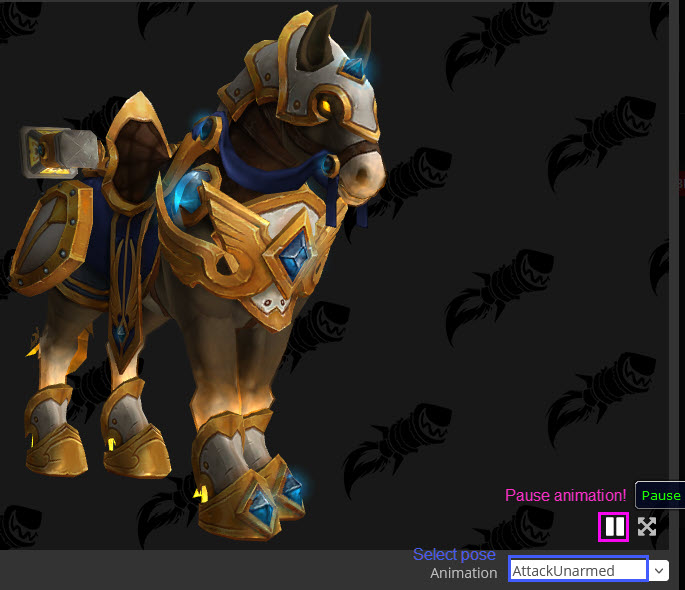
WoWHead Viewers
Select an Animation, select Pause. Select each model color, taking a screenshot.
Cut Out Models
For models on a plain background, these methods can help you quickly cut the models free.
To remove the background, you have some options: Select > Color Range... and select colors using the eye dropper, use Lasso Tools like Polygone to select, or Erase Background Color. You may need to use a mix of these. I like Color Range and removing/adding to the selecting using the Polygonal tools.
You can cut out a model or cut sections of a model.
For a quick overview of Photoshop tools, see this post at Adobe.
Select Color Range
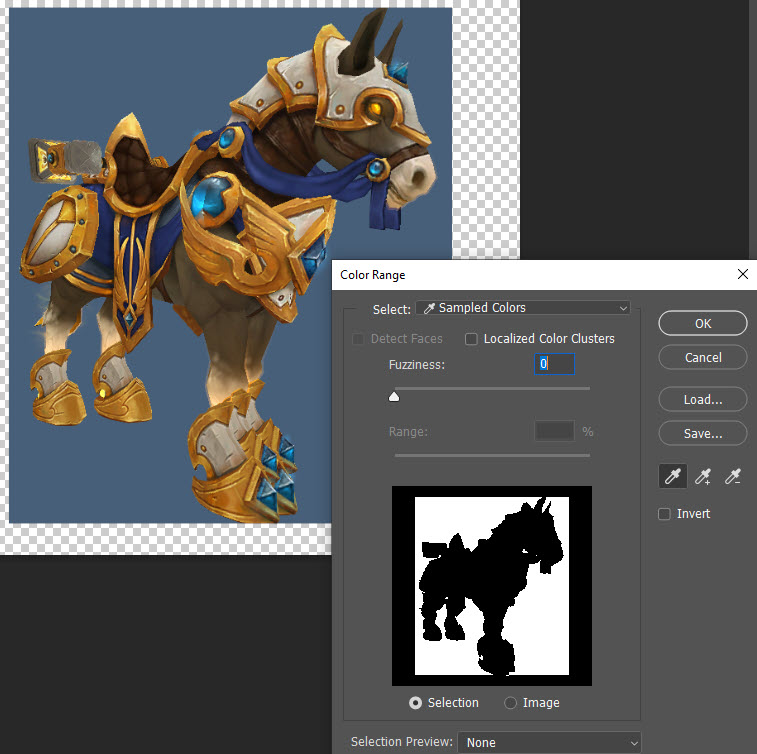
The easiest by far is Color Range:
-
Click Select > Color Range...
-
Click in the blue background with the eyedropper. The color you select will become white, indicating it will be selected (with the Selection option clicked in the preview).
-
To add additional colors and shades, hold Shift and continue selecting with the eyedropper.
-
For Fuzziness, consider shifting it up to the 15-20 range if needed for the edge. WoW models will have a jagged edge in screenshots. If you see parts of the model shift from black, parts of the model are being selected.
-
Click Ok to see the selected sections. If it is exact, hit delect to clear the background. If you need to make additional edits, see the next sections.
Select with Lasso Tools
You can select along the edges of models using a couple different Lasso Tools: Lasso, Polygon Lasso, and Magnetic Lasso. See Adobe help for detailed in on using all of these tools. The following examples use the Polygon Tool.
If you see glow effects, parts of the model selected, or funky edges, you can further edit the selection before clearing. For example, the steed has a glow effect causing issues just using Color Range.
-
Select the Polygon Lasso Tool.
-
Hold Shift or select the
 Add option to add selections to a current selection, or to keep adding selections. You want to follow the edge of the model.
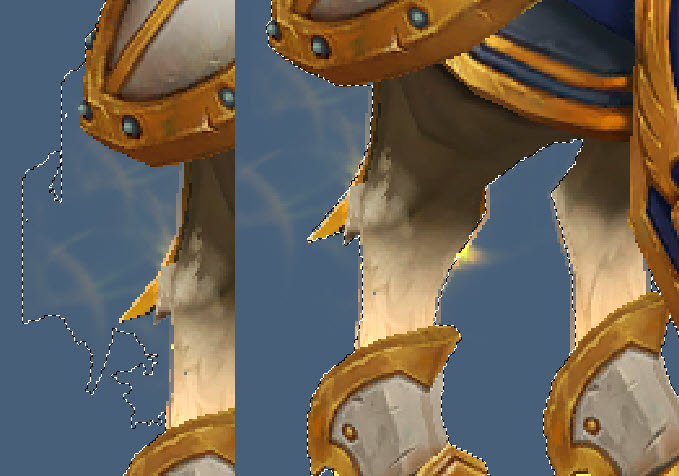
-
Hold Alt or select the
 Subtract option to remove selections. If some of your model is selected that you want to keep that content, this is a great way to unselect content.note
This is extremely helpful when using Color Range... with WoWHead captures due to the background being shades of gray with black logos.
Select with Channels
This is a bit advanced but incredibly powerful when selecting and cutting around tiny details like spaces between ropes in a net. Don't directly edit the channels as this will affect your image. You will create and work with copied channels!
If you have models you want to select with a ton of magic effects or from a screenshot, this method is incredible.
Channels are extremely effective selecting tiny areas. It is a tab next to Layers. It has an RGB (all colors in your image), Red, Green, and Blue. The trick with these selections is to show/hide these colors till you find one with the best contrast.
-
Select the Channels tab and turn off all channels. Show/hide till you find a channel with the greatest contrast between the background and model.
-
Create a copy of that channel by right clicking and select Duplicate Channel... or dragging it to the Create Channel button.

-
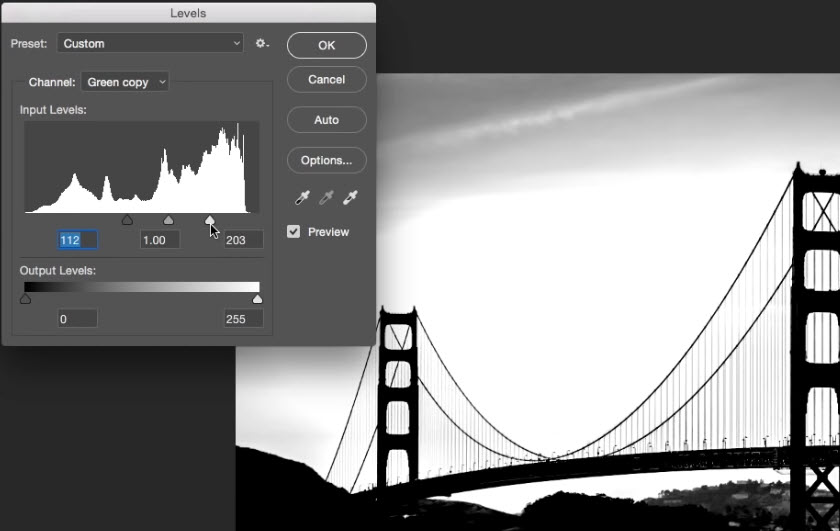
With ONLY the copied channel showing and selected, select Image > Adjustments > Levels.
-
Drag the sliders back and forth until the foreground or model is more defined than the background. This example gives you a better idea of how helpful this is (bridge photo):
-
Make selections in this copied channel. Hide that channel, select the RGB to get back to your image. Now you can delete or add masks to carve away the model from the background.
Select with Wands
Photoshop has a ton of wand select tools that can do extraordinary things, like detects objects in your selection area. If your hand is shakey for lasso tools, try using the Magic Wand and Quick Selection tools.
- The Quick Selection Tool automates the logic for finding and selecting an object based on the around you lasso around.
- The Magic Wand works somewhat like the Color Selection, using thresholds to capture and select based on colors you click on. It's great for quick selections, but not as refined.
Quick Selection is great for images with a defined edge between model and background by paiting a selection. This tool is under the magic wand list:

For this you will use a brush, recommend any soft round brush with a hardness of 100%, spacing 25%. Size and pen pressure all depends on your selection area and use of mouse vs tablet. Select the layer you are selecting in, click and drag across, painting your selection. If the selection includes content from your model, hold alt or the remove button, select in the model, and paint up to the areas to keep. It's that easy!
Magic Wand selects content based on the first color/lumious values/etc you select, or the sample. To select and keep adding per click, hold Shift or select the ![]() Add option. You have some options to set for making the most of this tool:
Add option. You have some options to set for making the most of this tool:
- Sample Size: Point Sampplle selects the exact point you select and any that match it. It's the default and best.
- Tolerance: Expands the threshold or shades up and down for the color/lumious values/etc you selected. 32 is the default, play with this up to select more or down to restrict. If you select, and parts of your image are captured, reduce this to 10 and try again. You can also hold Alt or select the Subtract option to remove selections
- Anti-alias: Keeps the edges clean, not jagged, touch of feathering. Recommend keeping this on.
- Contiguous: Checks and selects all color next to it that matches. Keep this enabled to only select adjacent content, not all colors across the entire image.
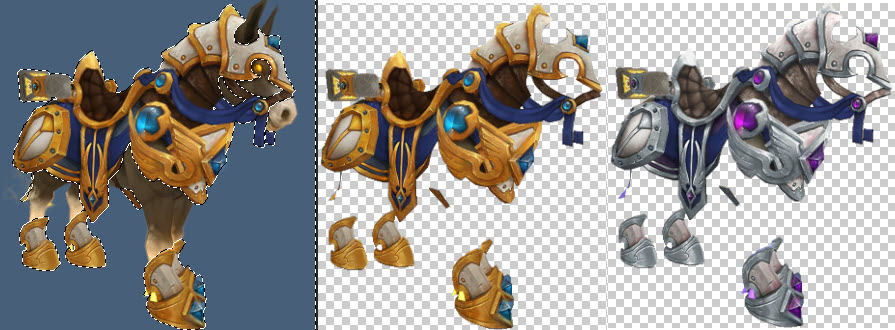
Cut a Section of Models
Now that you can select entire models, use these tools and lessons to select only parts of the model.
For example, we may want the armor from the Paladin mount, not the horse. We could use this armor for other mounts, people, and more! Selecting just the armor, cut and paste those selections (saving the original if you need it later). If you have multiple looks of model, you can select on each layer if the models line up.
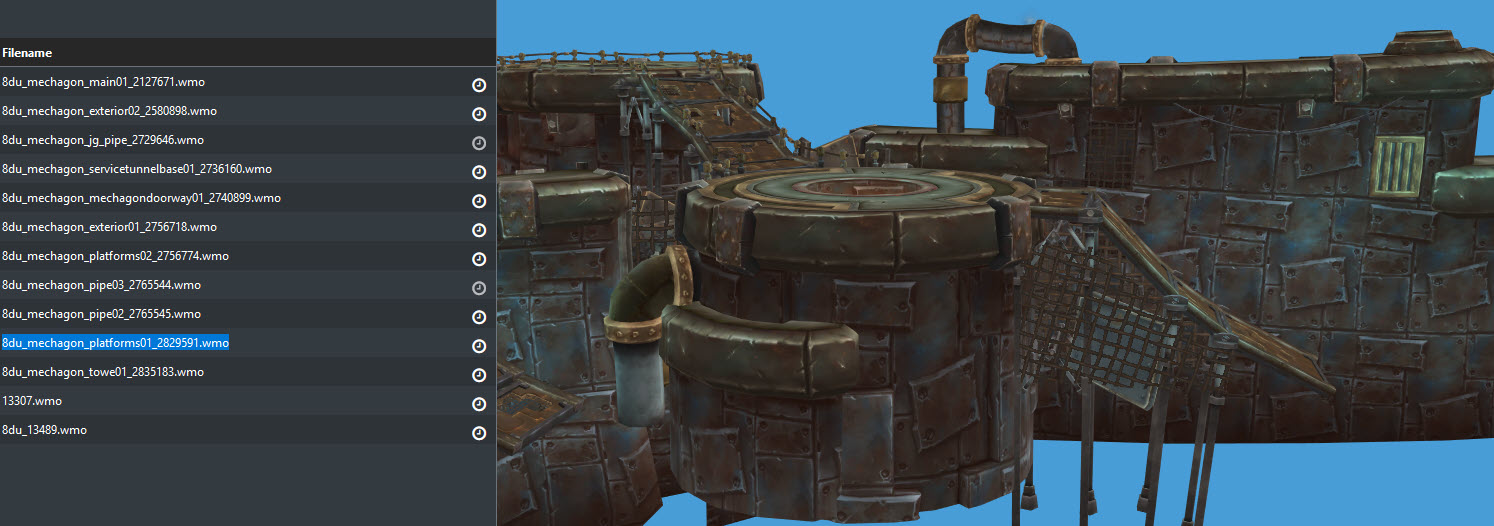
For this ship model, I captured tons of angles from external platforms of Mechagon (8du_mechagon_platforms01_2829591.wmo) and some from internal Mechagon dungeon (8du_13489.wmo) then layered them using different layouts of the content. They became walls, wings, some buildings turned into engines, caution tape was added to the wings, and some effects for fire.

Need fireblasts, arcane domes, ghostly glows, different forms of magic for your creations? Check out the effects gallery and this incredible Effects PSD put together by Maxen primarily with some extras from Sonceri.